Welcome to the second half of my two-part tutorial on building your own LangChain-powered AI app. Last time, I explained the limitations of queries to LLMs, and the role of LangChain and vector databases in enriching the context an LLM has to work with.
Now that we understand challenges and limits with LLMs and how we can make them even better, let’s build our own Chatbot app on cnvrg.io using LangChain and Streamlit. Streamlit is an open-source Python framework for machine learning and data science teams. It allows you to turn data scripts into shareable web apps with minimal coding.
Architecture
The flow architecture depicted in the image represents a typical information retrieval system powered by AI, commonly used in AI assistant apps and search engines. Here is a step-by-step explanation of the process:

- Web Crawling and Document Reading: The system searches the web and reads various documents to extract relevant text chunks.
- Text Embeddings: The raw text chunks are converted into text embeddings, which are numerical representations that encapsulate the semantic meaning of the text.
- User Query Submission: The user submits a query through a chat interface, seeking information.
- Query Embeddings: The user’s query is converted into embeddings using the same process as the document text chunks, allowing for semantic comparison.
- Vector Storage and Retrieval (Semantic Search Begins): All embeddings are stored in a vector store. When the system receives the query embeddings, it conducts a semantic search by comparing the query embeddings against the stored document embeddings to find the closest matches. This comparison is based on the semantic similarity between the query and the document embeddings, which is determined by the proximity of the vectors in the embedding space.
- Answer Generation (Semantic Search Continues): The system retrieves the text chunks associated with the embeddings that best match the query embeddings. These chunks are the ones most likely to contain information semantically related to the user’s query. These relevant text chunks are then provided to a LLM, which performs a deeper semantic analysis to understand the context and generate a precise answer based on the query and the semantically related text.
In summary, semantic search is primarily executed in the vector storage and retrieval step, where the system identifies the document embeddings that are semantically closest to the query embeddings. The process concludes with the LLM using the context of the retrieved documents to provide a semantically relevant answer to the user’s query.
This process allows the system to handle a vast amount of information efficiently and provide accurate, context-aware responses to user queries in a conversational manner. The use of embeddings and vector storage is critical for handling the scale of data the system must process and ensuring the speed of retrieval.
AI Development on the cnvrg.io MLOps platform
Step 1: Setting Up Your Project
- When we first login to the platform, we land on the projects page, where you’ll see all of the projects that you created, the project that you’re associated with, as a collaborator on.
Let’s click on start our new project in the upper right corner and choose “git repo” or “upload files”.
For git repo you can use this repo.
When you choose to upload a file, cnvrg.io offers out-of-the-box local version control files that are associated with the project.
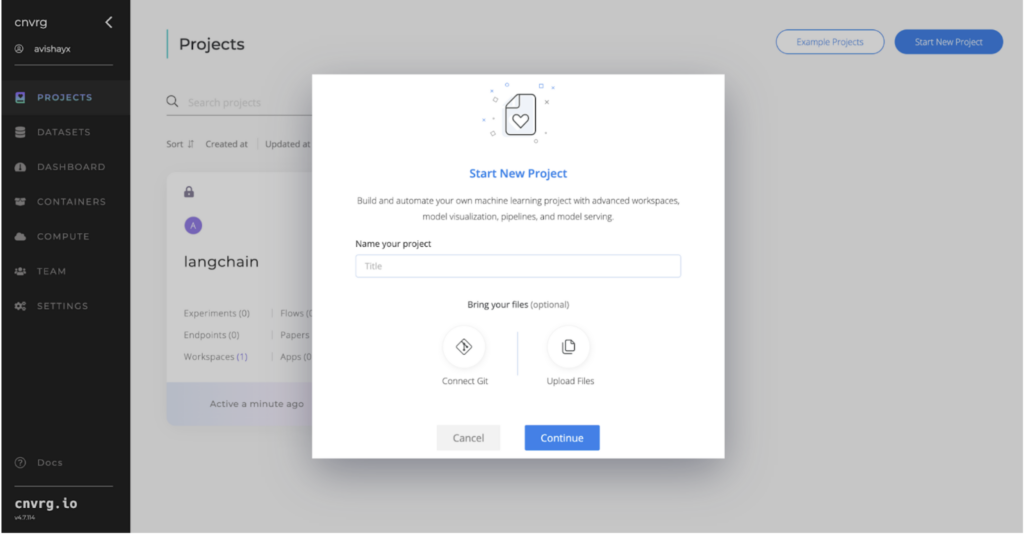
Once our project is ready we can create our first datasets.
Step 2: Managing Datasets
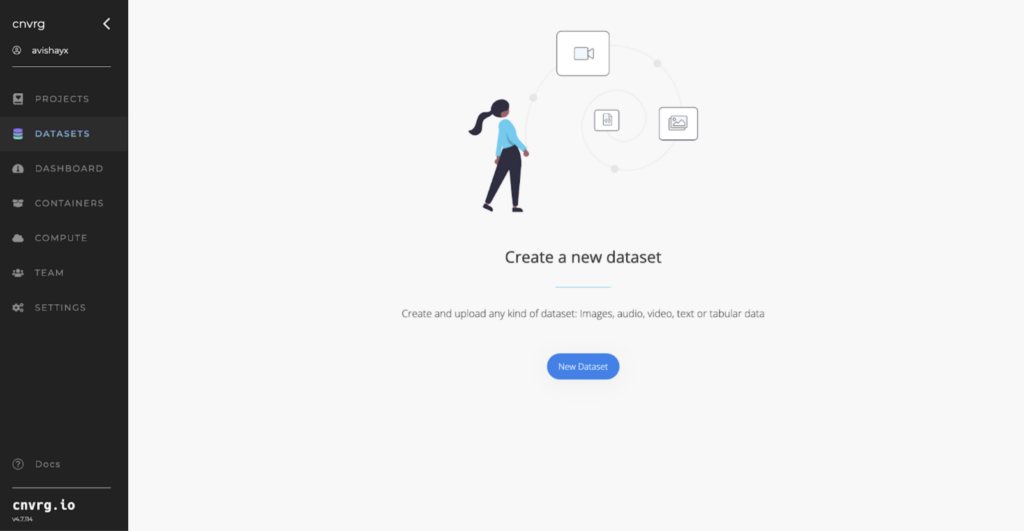
Navigate to the dataset section on the left side to create a new dataset.
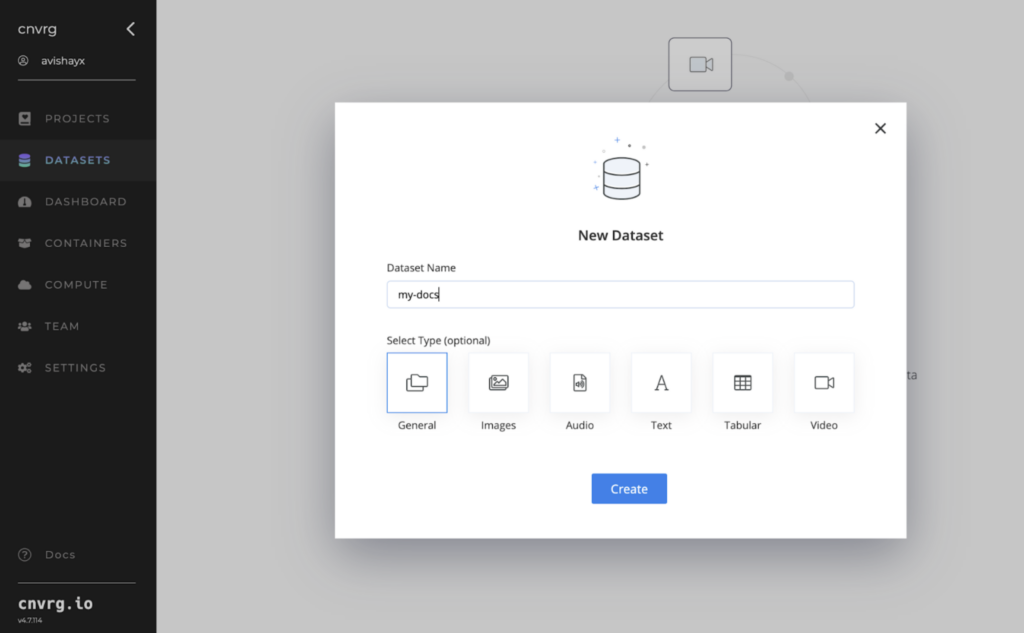
assign it a name.
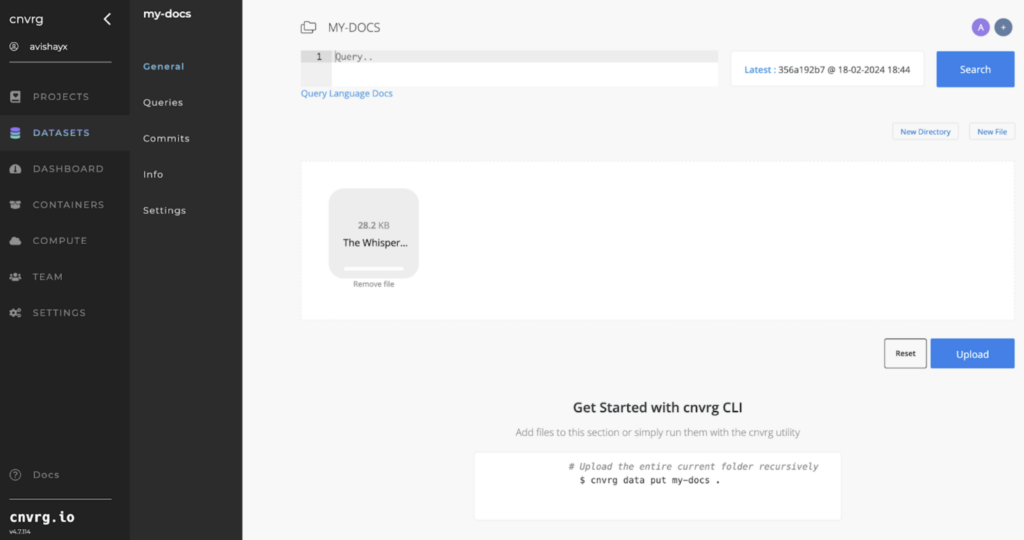
Upload the file into our newly created dataset bucket. You can drag and drop the file, and click on the upload button. You can also use our sdk or cli interface to upload large files.
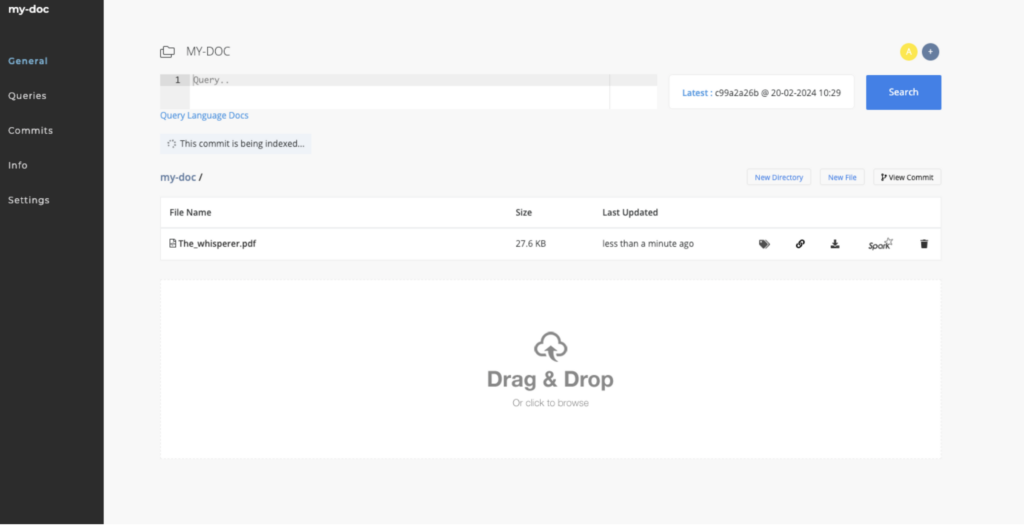
cnvrg.io automatically manages file uploads with its version control system, tracking every change to your datasets, so you can always roll back to the previous change.
Step 3 – Upload files
Let go back to the project page and select the project you’ve created. Click on the files section.
You can clone the files from repo and upload them to cnvrg just like in the datasets example above.
Step 4: Launching the Workspace
Now let’s click on workspace to launch a development environment.
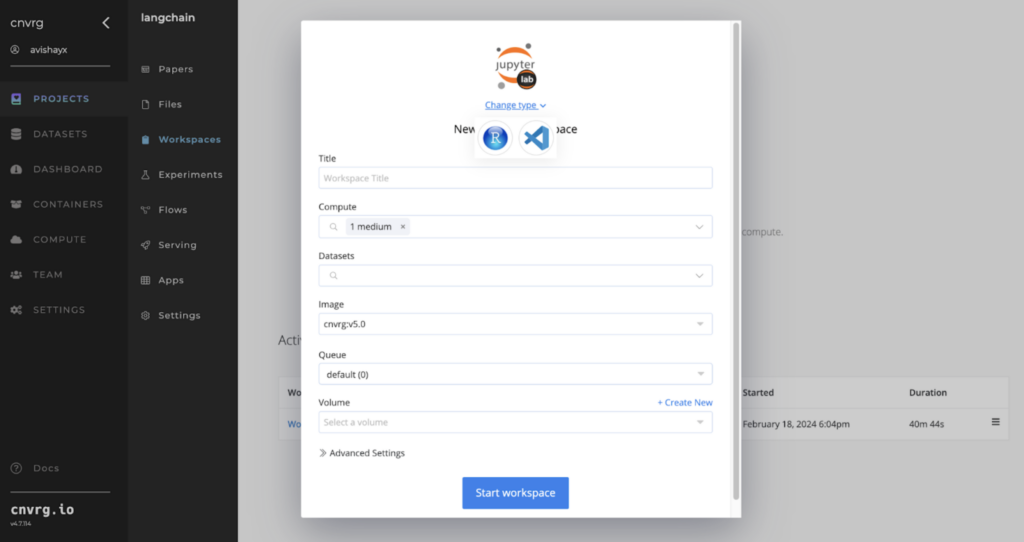
A workspace in cnvrg, is where the early experimentation takes place, more as an interactive environment for developing and running code. You can choose to develop in JupyterLab, CVAT(image and video labeling/annotation tool), R Studio, or Visual Studio Code.
You’ll also want compute, memory, and storage for your experimentations. In cnvrg.io, templates are software-defined abstractions to hardware that you can apply to your workspace, or at other points in your ML workflow. Choose a compute template that fits your requirement to run (the image shows a medium-sized template above). As in the example above, you select a software image to work with (e.g., the cnvrg-v6 image, which includes the latest Python version and relevant libraries). Let’s also select the dataset we created earlier and select “Start workspace”
When JupyterLab is operational, you can also mount our dataset as shown below:
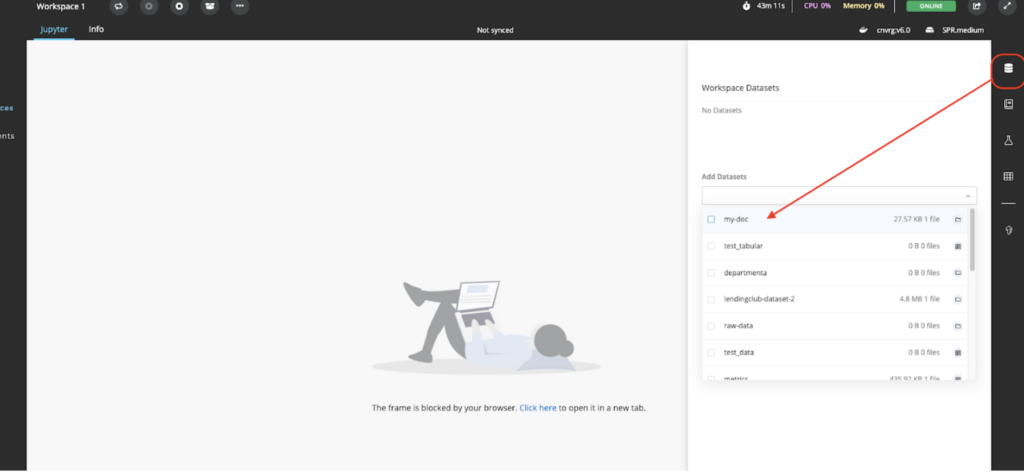
In our new Jupyter workspace, let’s now open our langchain_demo_pdf.ipynb and see how this works.
Again, you can find all source code in the repo.
					from PyPDF2 import PdfReader
from langchain.embeddings.openai import OpenAIEmbeddings
from langchain.text_splitter import CharacterTextSplitter
from langchain.vectorstores import FAISS
from langchain.chains.question_answering import load_qa_chain
from langchain.llms import OpenAI
from langchain_openai import OpenAI
from langchain_openai import OpenAIEmbeddings
We first import several components from the langchain and PyPDF2 Python libraries for reading PDFs, generating text embeddings with OpenAI models, splitting text into manageable chunks, performing similarity searches, and executing a question-answering pipeline. Additionally, it uses custom OpenAI classes for embeddings and language model interactions
					import os
OPENAI_API_KEY = os.getenv("OPENAI_API_KEY")
This code snippet securely retrieves the OpenAI API key from environment variables, a method often used in conjunction with cnvrg.io workspaces’ secrets feature. This way, you can manage sensitive information, like API keys, without hard-coding them into the source code.
					# Initialize the LLM with the specific model
llm = OpenAI(model_name="gpt-3.5-turbo-instruct")
# Define your query
our_query = "Who is Leo Demo? and how old is he?"
# Use the invoke method instead of the __call__ method
response = llm.invoke(our_query)
# Print the response
print(response)
Next we initialize the OpenAI GPT-3.5 Turbo model to ask about a fictional person, “Leo Demo” and his age. Using the invoke method, we directly query the model, which attempts an answer. The model replied it needs more details to answer properly. We expected this, because the model hasn’t been trained on anything about “Leo Demo”, and we haven’t supplied any additional context. Let’s see if we can supply a document with the necessary information.
					# LLM call with our PDF as reference
data = PdfReader('/data/my-doc/The_whisperer.pdf')
embeddings = OpenAIEmbeddings(openai_api_key=OPENAI_API_KEY)
This line initializes an instance of the OpenAIEmbeddings class, providing it with the OPENAI_API_KEY to authenticate requests to OpenAI’s API. The OpenAIEmbeddings class is designed to generate vector embeddings for text using OpenAI’s models.
					documentsearch = FAISS.from_texts(finalData, embeddings)
chain = load_qa_chain(OpenAI(),chain_type="stuff")
Then we initialize a document search engine using FAISS for efficient similarity search with text embeddings, and set up a question-answering chain for answering queries based on document content.
					our_query = "Who is Leo Demo? and how old is he?"

docs = documentsearch.similarity_search(our_query)
response = chain.invoke(input={'input_documents': docs, 'question': our_query})

# Print the response
print(response['output_text'])
We conduct a search to find documents that might mention “Leo Demo” and his age, using a special search tool. After finding the related documents, we ask our question-answering system to review those documents and answer the question. The system then provides us with a specific answer based on what it found in the documents.

Having gained an understanding of the process, let’s move forward with constructing our application and crafting a chatbot utilizing the Streamlit framework.
Within our project files, we have app.py, which is set up and ready to execute our applications. To launch the application, first, open a terminal from Jupyter by navigating to File -> New -> Terminal.
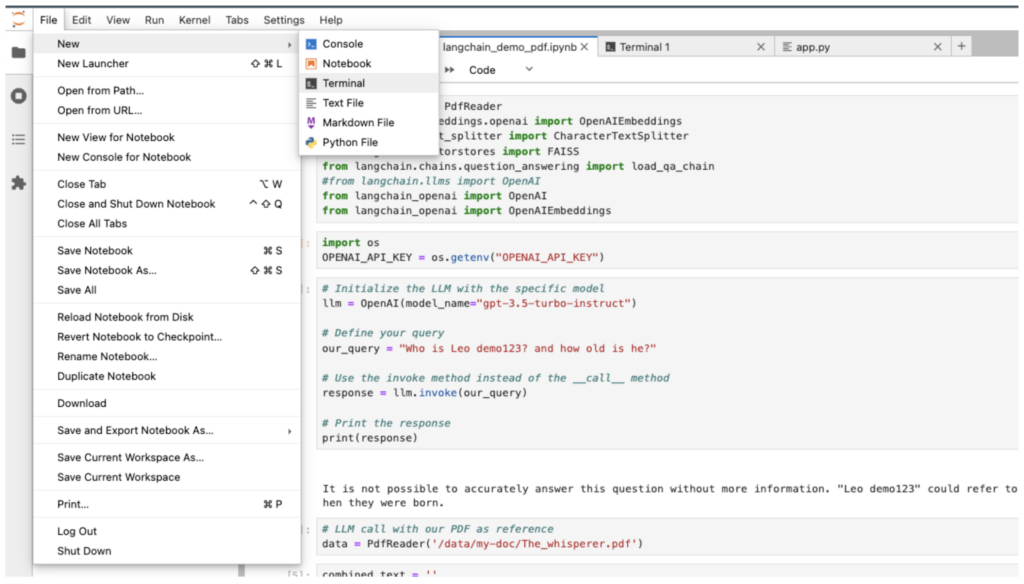
And run the following command:
cnvrg# streamlit run --server.port 6006 app.py
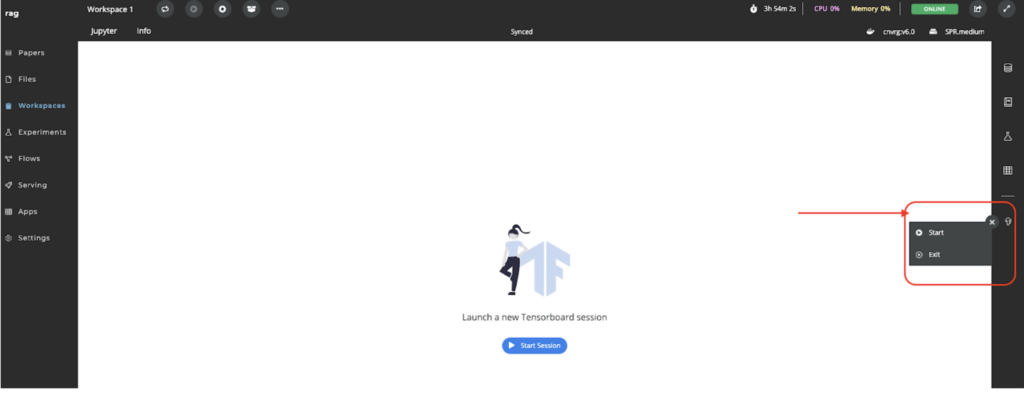
In the right corner, you will find the TensorFlow icon; click on it and then hit “Start” New Webpage’. After a few seconds, your new chatbot web-based will appear.
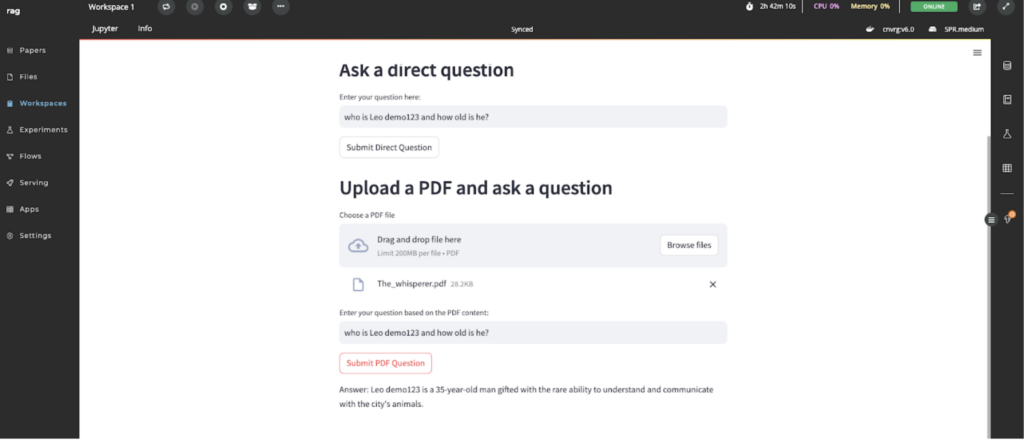
Now, let’s try our demo by asking some questions based on our story in our pdf.
My question was, who is Leo Demo and how old is he?
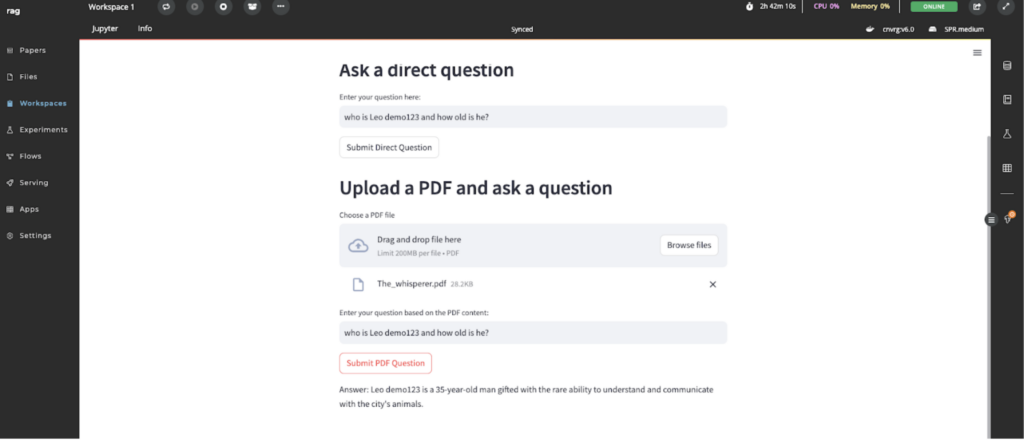
As you can see, it is difficult for the model to provide an accurate answer, since, as we said, it doesn’t know who “Leo Demo” is.
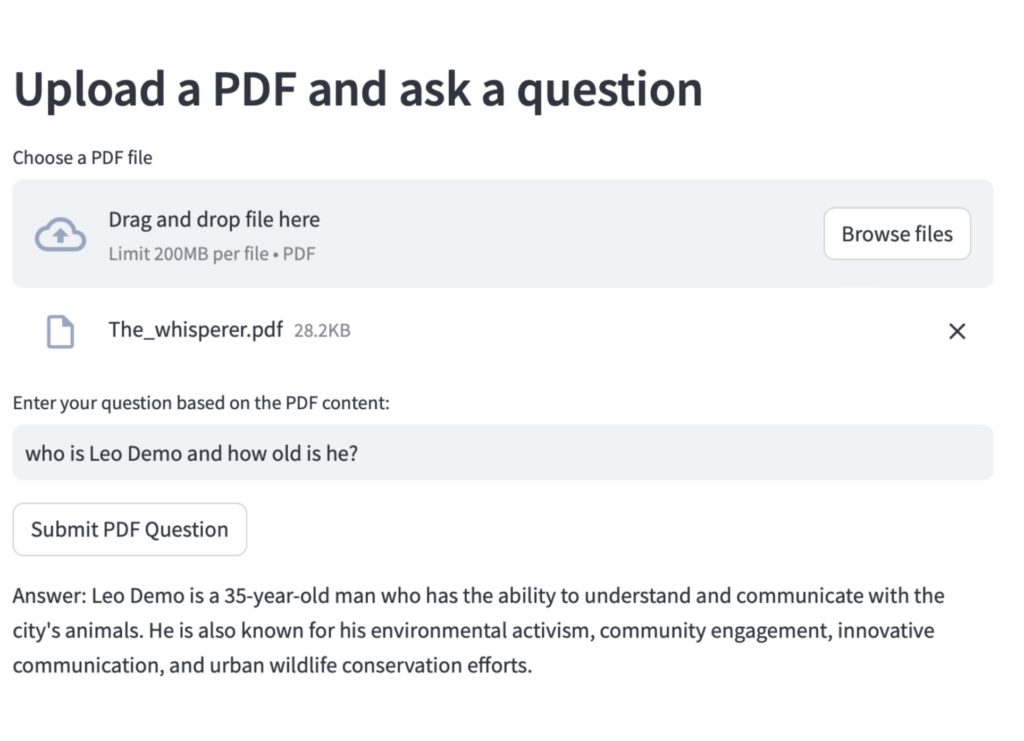
So what happened? We loaded the model with information from our vector store. Now that the model is aware of Leo, and provides a more clear answer with the right context. Imagine what you can do with your data! You can also use Python libraries to ingest information from web services, SQL databases, CSVs, and other sources.
I hope you found this blog engaging and informative. Please feel free to reach out if you have any more questions. As a technologist with a passion for writing, I plan to share many more intriguing articles here. Don’t hesitate to follow me both here and on LinkedIn for updates and insights.

