For an overview on AI blueprints please refer to part 1 of this blog here
Create your own blueprint
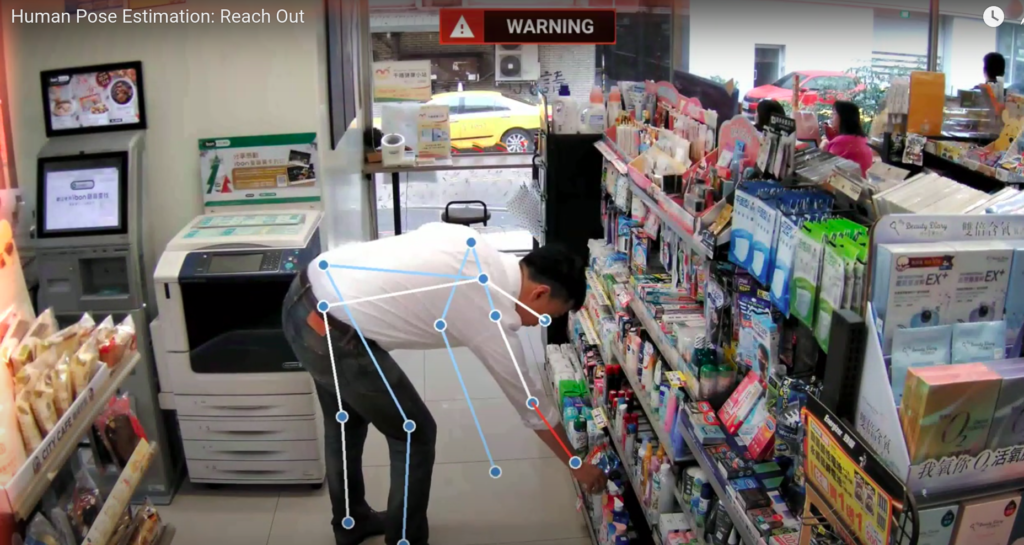
To demonstrate usability of a blueprint let’s take a closer look at the anatomy of one of the existing blueprints in the Marketplace. “Pose Detection” is a blueprint that aims to detect and identify human poses in images and classifies them into various categories of “generic human poses” and “yoga poses” like walking, running, goddess pose, camel pose etc. It can be particularly useful in situations of surveillance in grocery stores for example.
Being an end to end solution, the Blueprint consists of several components like: –
- Library (s) [individual component ; multiple libraries packaged together will be called blueprints]
- Code [python code/R code]
- Meta-Files [yaml file, requirements file, prerun.sh, model files]
- Yaml File [meta-information]
- Readme File [instructions about the blueprint]
- Endpoint [Endpoints streamline model deployments for real-time scenarios and provide a unified interface to invoke and manage model deployments across various compute types.]
Sample files for a blueprint
For starters, you have to first go to this link and sign up for early access.
Once you’re in, you’ll get access to a specific tenant and that would be your base for a while.
Enter a new tenant (Physics here for eg)
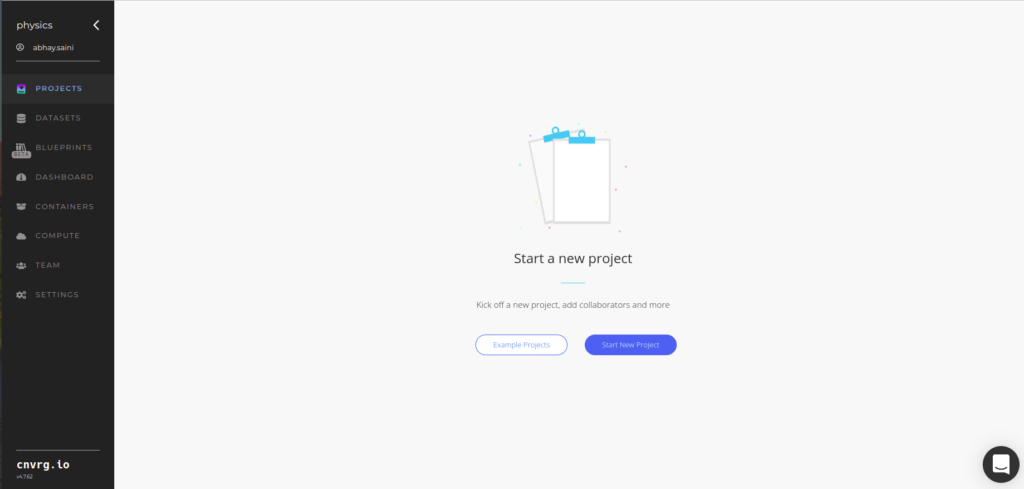
In that tenant, you’ll see a bunch of options, from which select “Projects” and then “Start New Project”.
Once you’re inside the project, go to workspaces and click on it. Name your first workspace, choose a small/medium compute (for starters) and start the workspace. You can also choose your image (default one is cnvrgv5 which refers to python 3.6.9 without any additional dependencies installed, or others like python3.8 or tensorflow 22.02-tf2-py3. The latter will be pre-installed with tensorflow while the former will not.)
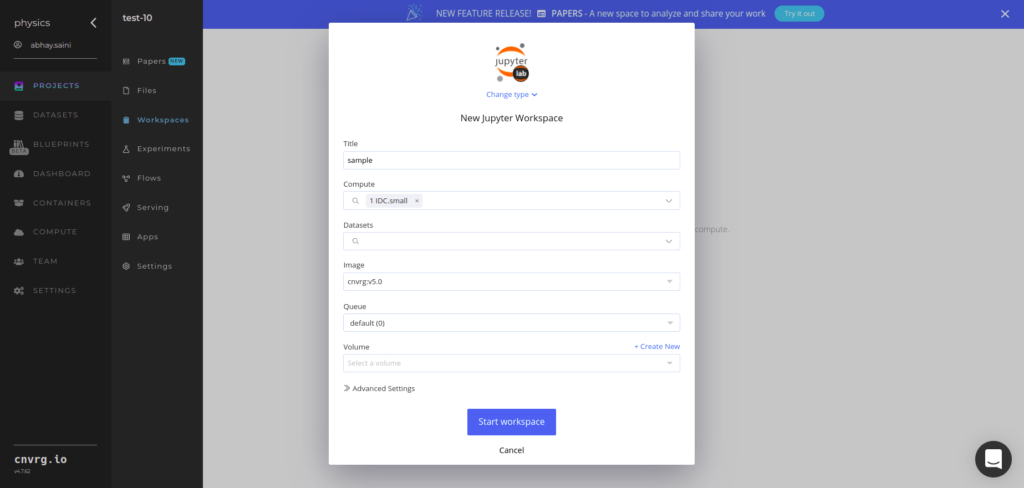
Prefer “small” or “medium” computes for faster processing
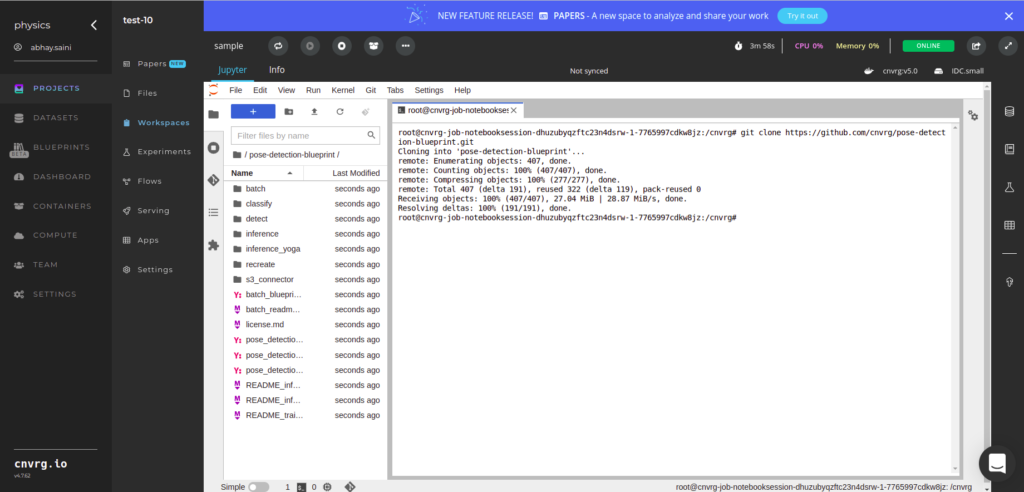
After you open the project you will see a UI with a file explorer, a python notebook and a terminal. These will be your tools to create a nice little library which will be the bread and butter of your blueprints.
Since we are following a guide, let’s focus on our task at hand, namely the pose detection blueprint. The pose detection blueprint consists of 4 basic libraries, “recreate”, “detect”, “classify” and “inference”. “Recreate” refers to the library which divides the images into training and testing blueprints. “Detect” library detects human poses in images while the “Classify” library classifies those detected images into various poses along with their bounding boxes. “Inference” is a mini form of a full-fledged, stand alone library that does the tasks of all 3 stages with minor differences.
For this guide, we won’t create anything from scratch but rather clone a pre-existing blueprint and change a few things.
To start, type this command in the terminal window once you open the workspace.
git clone https://github.com/cnvrg/pose-detection-blueprint.git
This gets all the files into the workspace at once. Since we just want to create a simple blueprint, let’s ignore all the subdirectories except the four mentioned above (“recreate”, “detect”, “classify” and “inference”). We would also use the folder “s3-connector” (you’ll understand the significance later) and “README_train” and “pose_blueprint_train.yaml”. Delete the rest with the following commands.
Open Terminal and then type the command
For directories :- rm -rf directory_name
For files :- rm filename
Now we can easily reproduce the exact same blueprint. Since the purpose of this blog is to learn how to create one, we will make some changes in the existing blueprint and through that learn the contents of blueprints.
Gathering your data
Before deep diving into the code of the blueprint let’s focus on getting the data first. The data we need in this case is humans in various poses and in various image formats (like jpg and png). Since we would be using Tensorflow’s “Movenet Thunder” for our detection (A pre-trained model that detects a single human in an image), we should keep our training images limited to single human images. Although this blueprint can detect multiple humans too, doing that in training is a topic for another blog post. Lastly, the images should not be of complicated/overlapping poses, so as not to confuse the training algorithm and give the same result of two different poses or two different pose names for the same pose.
Sample (recommended) pose names would be :
- Walking/Running
- Sleeping/Standing
- Lifting
- Sitting
- Cycling
Sample images look like this:

Just remember the path of the directory which contains your pose folders
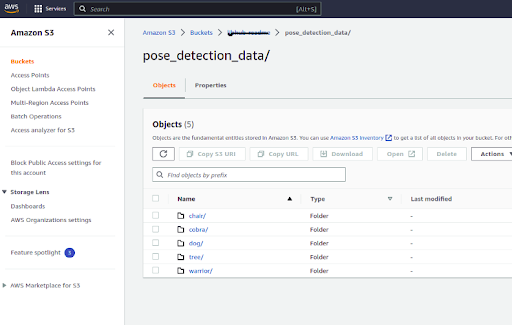
And yes, as you very smartly observed, you’d need an s3 account to start, as this particular blueprint sources its data from s3. (Azure and Google Cloud connectors can be used as well).
After collecting all the images in the respective folders, upload the directories to s3, under one folder (you can name it anything, for eg “pose_detection_files”). A total of 120–150 images are sufficient for a decent result. You can try with any number though.
Work involving s3 is done for now and we can return back to the code. Let’s tackle the “recreate” library first.
Recreate
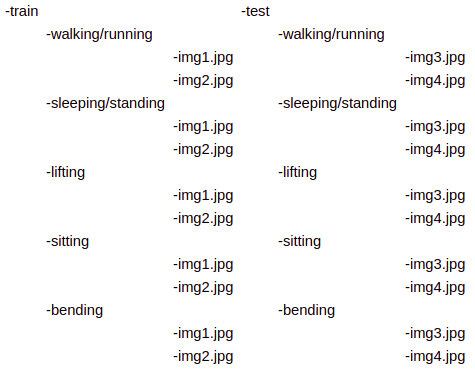
- The directories of train and test, for each pose are created.
- The images are split between train and test in a ratio of 80 and 20 (which you can change to your specifications).
- The images are copied in the train and test directory respectively.
Another standard that we follow in the python codes of blueprints is to use all import statements in the beginning while using the argument parser, just after the import files. And this argument parser can be used to write the arguments in the library yaml files.
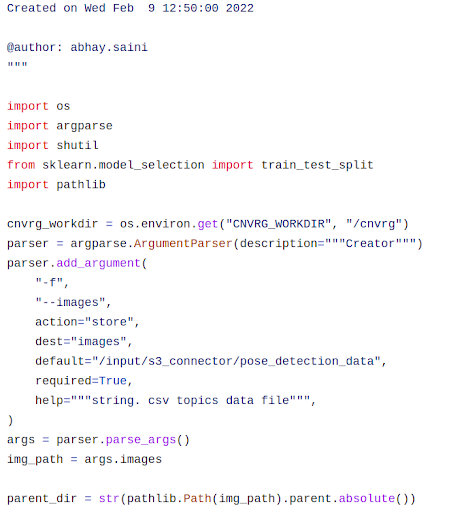
Import statements at the beginning ; Argument Parser next
This is what the output will look like in the artefacts (i.e after you run the blueprint):
There’s not a lot you can change in this library other than the test-train ratio, so let’s move forward to the other files, beginning with the yaml.
In the library.yaml file, the title refers to the name of the library, (which can be changed). Description contains the tasks that this library will do. Change the author/author-email to your own name/email. Tags are just like hashtags which will help find your blueprint amongst the repository. For now, just put the “training” tag. You can also put the “train-test split” tag in the library yaml if you like. Command is nothing but the word python after the name of the code file (ending in py). It is used to execute the file later. Requirements refers to the compute requirements in terms of CPU/GPU and memory. Usually, the default memory requirements for most smaller blueprints (like pose detection) is 3.5 CPU, 8 memory and 0 GPU/HPU. Last parameter, Arguments contain three keys, “key”, “type” and “values”. “key” refers to the name of the parameter while “type” refers to the data type of the parameters (categorical or discrete), and “values” contains the exact value of the parameter (that will be used in the code). However the values of library.yaml are overwritten by the values in the blueprint.yaml so these values are not essential to the code.
Again, not much to change here, so let’s move forward to the next file, which is the requirements.txt. This file contains the list of libraries (with their version numbers) as well as the dependencies required to run the blueprint, listed in no particular order. Please note, in case one of your requirements fails, none of the requirements below will install.
Lastly we have the prerun.sh and readme.md. prerun.sh contains the shell commands to install a few requirements even before the requirements.txt file is run. In our case, we don’t need anything but just to demonstrate the utility of this file, here is an example of a prerun.sh file from another library “classify” and “detect” (both of which will come later).
					apt-get update
apt-get install -y libgl1-mesa-dev
apt-get install -y libfreetype6-dev
These commands will help in installing opencv on the cnvrg.v5 image.
Readme.md is the instruction manual for your blueprint for anyone reading from the open source community. It not only contains a brief description of the tasks that this blueprint will accomplish, but also the list of the input/output artifacts in their original forms. There is no set format for writing a readme file, so follow the template only if you are at a loss of what to write. Otherwise, every reasonable format works.
After having done a thorough description of the files in the recreate library, it’s time to move to another library “detect”. However, this time just go through the code file pose.py, rather than go through each of the other miscellaneous files (yaml, requirements, readme or prerun).
Detect
In the detect library, you can broadly perform the following functions:
- Process an image and transform it for applying Movenet Algorithm on it
- Detect using Movenet
- Extract the landmarks in a CSV file
- Draw the bounding box and the key-points on the image
- Get landmarks in a csv file and export it
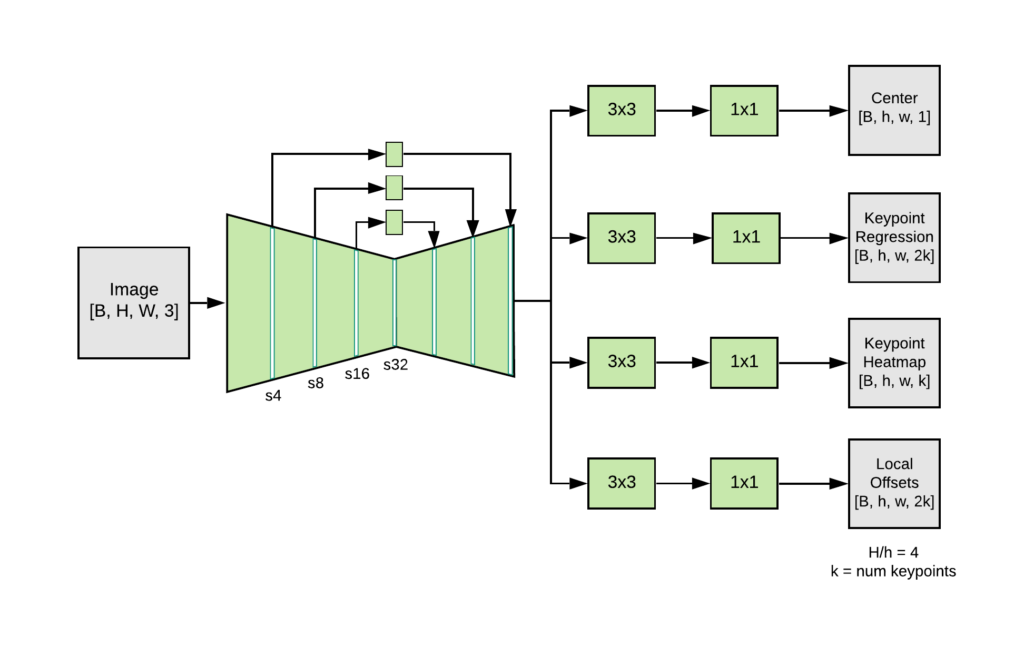
Movenet Thunder Architecture Image Source
Here is a brief description of the main class and functions within it:
- class MoveNetPreprocessor(object) does the bulk of the image processing (decoding etc) and extracts the landmarks (key-points) of the humans involved.
- def process(self, per_pose_class_limit=None, detection_threshold=0.1) is the main function of the class that does the processing. If the confidence with which the Movenet algorithm has detected the humans is less than the argument (detection_threshold) given then those detections will be ignored.
- _all_landmarks_as_dataframe(self) puts all the information of the checkpoints of the human into a data-frame.
- def draw_prediction_on_image( image, person, crop_region=None, close_figure=True, keep_input_size=False) draws a polygon, joining the individual dots into a coherent frame on the human, both outlining the boundary and creating the skeleton of the person.
- def detect(input_tensor, inference_count=3) Detects the human and identifies the checkpoints of the human in the image.
Things that can be changed:
- Detection threshold (from 0.1): Lowering the detection threshold will identify the rougher/harder to identify humans, but it’s also liable to add noise/confusion by adding in extra caricatures which are not human.
- aspect_ratio_resize_dimensions (from 512,512): The aspect_ratio_resize_dimensions can be changed in case you want to identify lower resolution images.
- The variable cnvrg_workdir (‘/cnvrg/’) which is appended before any file that will be outputted to the artifacts section
Some extra files
A close look at the detect folder will show that there are a few extra files in here as well. Namely, InputSans-Regular.ttf, movenet_thunder.tflite and a folder called utils. These files are not essential to convert this code to a library, but it is useful to run the blueprints (as they contain the files for the Movent Thunder Model and some image visualization tools in a folder called “utils”). These files can be sourced from other locations (like s3, where our pose images are located) but if they are less than 15 MB in size, it’s better to put them here. Otherwise, they might cause latency issues in the git syncing.
The output artifacts of this library looks like this:

train.csv/test.csv

box_file.csv
Classify
In this library there is a classification, so it can have quite a few arguments in the argument parser (all that basically related to customising the keras fitting of the model). The file pose_classify.py, includes the following functions:
Load_pose_landmarks Processes the key coordinates of the important parts of a human body in a csv file and put it in a data-frame.
Get_center_point Extract the mean value of the coordinates of the left and right body-parts of each human (in each image)
Get_pose_size Extract the area (& max distance) of the pose to later normalise bigger poses with smaller poses (so that their size doesn’t interfere with the classification. Meaning a bigger human might appear as a sitting even though he was standing)
Normalize_pose_landmarks The normalising process (division by the size) happens in this function.
Landmarks_to_embeddings Reshape the data structure with the landmarks to a layer that can fit in the keras layer ecosystem.
Keras_model_fitting [Technically not a function in the existing code but can be made into one]
Creating a keras model which takes in the normalized embeddings as input and trains the model on the predefined list of poses that we originally started with. After that, fit, evaluate and extract the outputs into a dataframe and log them as parameters. Finally, write the pose name on the images themselves.
Things that can be changed:
torso size multiplier [it can be changed from 2.5 to something else, while normalizing the pose size]
Keras layers structure and order. [Currently there are 5 Dense layers, 1 softmax layer and 5 dropout layers, which can be changed both numerically and order wise]
Keras layers input dimensions/functions [relu can be changed to sigmoid or elu etc]
The output artifacts of this library look like the following:

test_dataframe.csv

Standing and sitting source [Note the skeleton like lines have been removed because of specific requirement (as shown in the very beginning]
Inference
The inference library is the last component of the blueprint. This library is not essential to the blueprint since we have the image with the label in the previous library. However, to deploy the app with a front-end, we need the inference library.
Inference code has the unique and distinct files from each of the previous libraries except for the train-test split. The code only has a few changes, the structure is entirely based on a function called predict rather than main. The main objective of this library is not to train anything new but rather use the weights that have been exported into model files. Using those weights, we just need to predict new images into poses. Also, the output needs to be in a json format rather than a csv file.
The main order of the code is as follows:
- Read the new images as a base64 string.
- Decode it within the predict function
- Read the decoded image and then run it through streamlined versions of detect and classify modules.
- And finally return a json with the coordinates and name of the pose.
Here is a sample output of the predict function:
{“predictions”: {0:[{‘human 1’:{‘bbox’:[10,20,30,40],’pose’:”standing”,’conf’:0.9},’human 2′:{‘bbox’:[50,60,70,80],’pose’:”sitting”,’conf’:0.8}],1:[{‘human 1’:{‘bbox’:[90,100,110,120],’pose’:”standing”,’conf’:0.78}]}
Anything that can be changed in the “detect” and “classify” blueprints can be changed in the inference library as well.
Putting it all together
Now that we learned the intricacies of each individual library and file, let’s publish a blueprint and get it to work on real data.
Before we do, let’s touch on the blueprint yaml and blueprint readme, the files that lay outside the folders we looked into.
Blueprint YAML is a combined version of the individual library yaml files that just saw within the directories. Under the heading of “tasks”, we can see the content from individual library.yaml files of each library, starting from s3-connector and ending with the inference library.
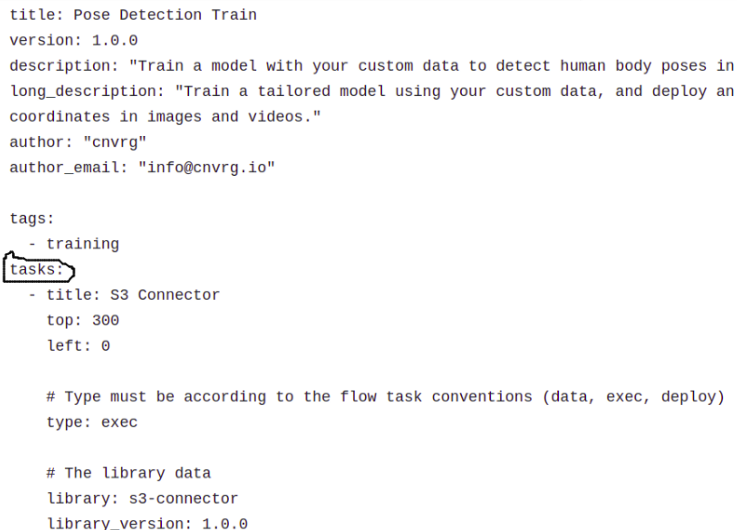
Under tasks, the library yamls are arranged.
Several things to note here:
- “title” and “library” are two different things. Title refers to the name of the library within the blueprint, while the library name is the actual name that can be used outside the blueprint as well.
- Top/left are the physical coordinates of the icons of the individual libraries, as can be seen within the blueprint.
- Individual computes/descriptions can be easily changed.
- The blueprint title refers to the name of the blueprint and can be changed accordingly.
Publishing the Blueprint
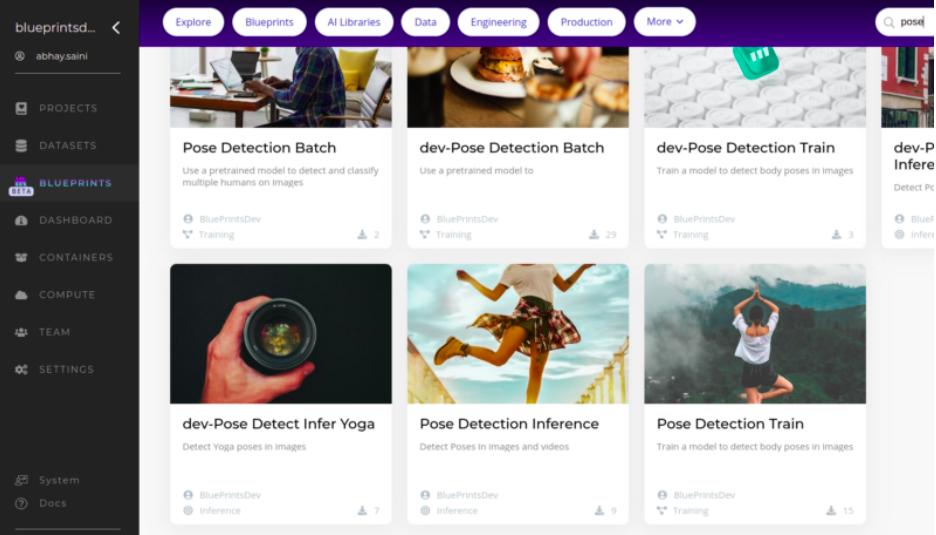
After you publish the blueprint, you will see it in the “Blueprints” section.
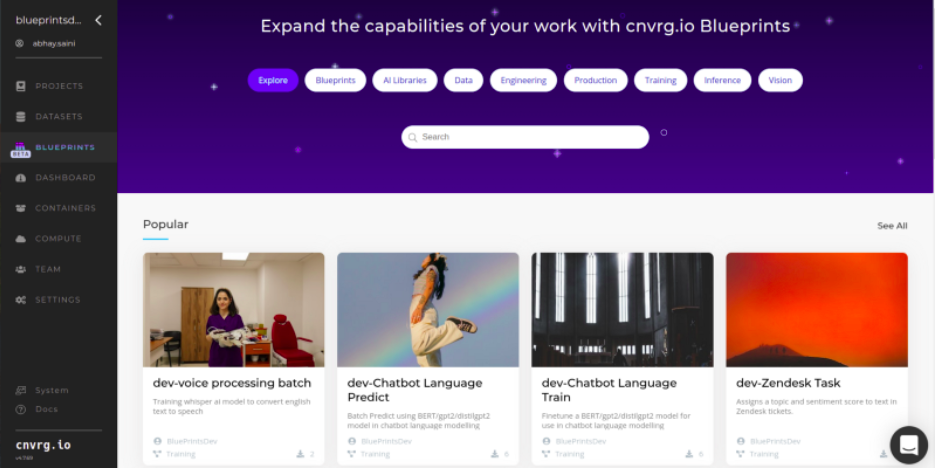
Depending on your tenant, you’ll see the blueprints here
For publishing/uploading the blueprint to the repo, you need a file called “autoload.py”

Link to the autoload will be provided after signing up
In that file, you’ll just need to edit
- default_version : version of the blueprint (and the individual libraries)
- library_files : list of the directories that will be used in the blueprint
- blueprint_file : the main yaml file that will represent the blueprint itself
- blueprint_readme_file : a readme file describing the process of compiling the blueprints
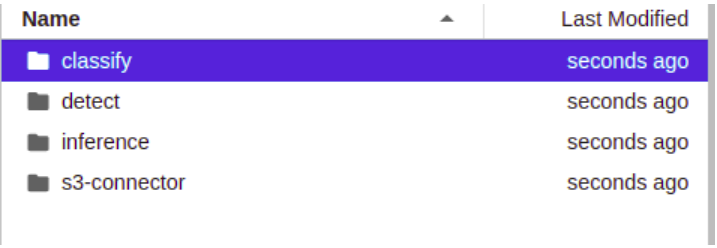
So for example, my library_files is
[classify, inference, s3-connector, detect]
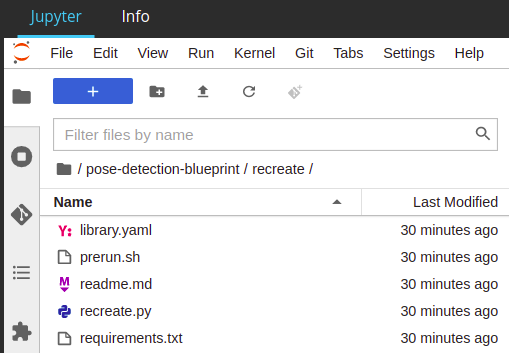
Here’s how my file explorer would look:
Once everything is in place, you’ll just run the following command in the terminal:
python autoload.py
And you’re done! Your blueprint will appear on the Blueprints page.
Then you just click on the blueprint, then click on “Use Blueprint” and then a copy of the blueprint will be deployed within the cnvrg.io infrastructure.
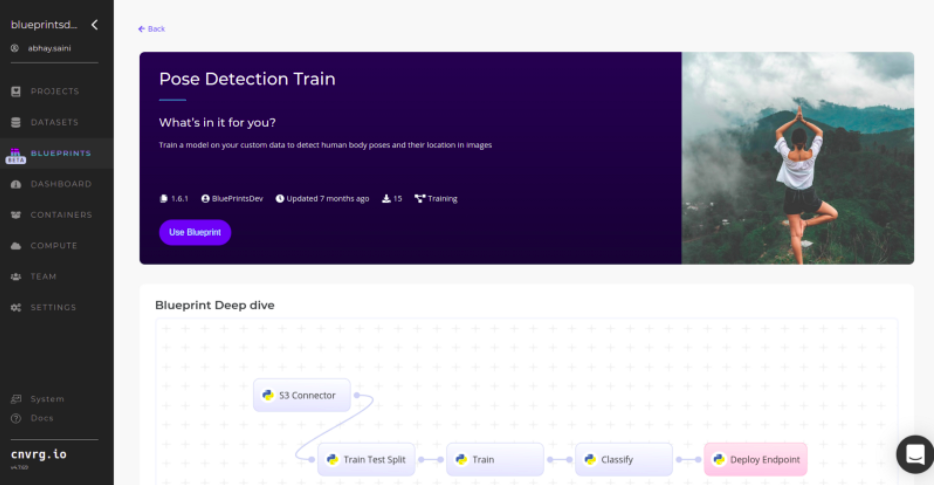
Please note the flowchart at the bottom. It refers to the interconnection of the various libraries you made.
In case you want to deploy it on your local machine, you’d have to use SDKs, which you can further study cnvrg.io SDKs here and learn about the command line here.
To learn more and get further help creating and using blueprints, click here.
In case you missed it, here is a list of public repositories that you can access for more solutions.
Thanks for reading.