
What is stable diffusion?
A stable diffusion text-to-image AI model is a type of artificial intelligence (AI) system that is designed to generate images based on a given text description. You may be familiar with the popular DALL-E 2, a model generated by OpenAI that generates digital images from natural language descriptions. These stable diffusion models are trained to understand the meaning of the text and to create an image that is visually consistent with the description.
Text-to-image AI models are used in a variety of applications, including generating synthetic images for use in machine learning and computer vision research, creating visualizations of text data, and enabling users to generate custom images based on their own descriptions. Thanks to the availability of stable diffusion in the mainstream, it has also become a common tool in day to day life, whether in marketing, art, or other forms of media. These models rely on advanced machine learning techniques and large amounts of data to learn how to generate high-quality images based on text descriptions.
How to run a stable diffusion model without GPUs
Because stable diffusion can be computationally intensive, most developers believe a GPU is required in order to run. However, this open-source implementation of Stable Diffusion in OpenVINO allows users to run the model efficiently on a CPU instead of a GPU.
This is good news for people who don’t have access to a GPU, as running Stable Diffusion on a CPU can produce results in a reasonable amount of time ranging from a couple of minutes to a couple of seconds depending on the CPU you are using.
How to get stable diffusion results in a few seconds with CPUs
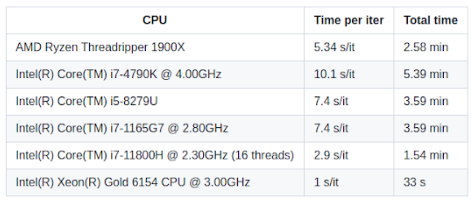
The time metrics listed in the Stable diffusion in OpenVINO git repository give an indication of the speeds that can be achieved for a single iteration on CPU.
In order to generate a good image, you need to run it for multiple iterations. The more iterations, the better the quality of the image generated. Some people might not be able to get the highest speed on their CPUs directly and would need to add an additional line of code in stable_diffusion_engine.py file given in this repository.
Under the line, self.core = Core() add the following line of code:
self.core.set_property("CPU", {"INFERENCE_NUM_THREADS": 8})
and change 8 to the number of cores in your CPU.
You can read more about this here https://github.com/bes-dev/stable_diffusion.openvino/issues/10
Install the requirements as given in the repository and run the file with the following command:
python demo.py --prompt "Street-art painting of Emilia Clarke in style of Banksy, photorealism"
Get much faster speed on 4th Generation Intel® Xeon® Scalable processor.
Now, if you have access to the latest generation of Intel® Xeon® Scalable processors you can achieve a speed of 3 iterations per second using 20 cores. That is 3 times the highest speed reported in the git repository. By using Intel® Xeon® Scalable processors for stable diffusion on OpenVINO, not only did the speed improve by 3x, but the images produced were very detailed and realistic, showing the potential that this open-source implementation of Stable Diffusion in OpenVINO has for creating amazing images using CPU. You can possibly even get higher speeds using more cores.
Below are some examples of stunning images that you can create using Intel® Xeon® Platinum 8480+ utilizing 20 cores using prompts from https://prompthero.com/ :
“long range view, Beautiful Japanese flower garden, elegant bridges, waterfalls, pink and white, by Akihito Yoshida, Ismail Inceoglu, Karol Bak, Airbrush, Dramatic, Panorama, Cool Color Palette, Megapixel, Lumen Reflections, insanely detailed and intricate, hypermaximalist, elegant, ornate, hyper realistic, super detailed, unreal engine”

“dark sci-fi , A huge radar on mountain ,sunset, concept art ,high detail,warm lighting ,volumetric godrays,vivid beautiful,trending on artstation by Jord”

How to run stable diffusion in cnvrg.io: a step by step guide
cnvrg.io is a machine learning platform that streamlines the development and deployment of machine learning models. It provides tools for version control, collaboration, model training, and deployment, allowing data scientists and machine learning engineers to focus on building and improving models, rather than worrying about infrastructure and other technical details.
Using the cnvrg.io platform, it is easy to run a stable diffusion model and generate your own custom image.
- Create an account on cnvrg.io
If you don’t already have one, you will need to open a cnvrg.io account. You can request access to cnvrg.io for free, or request to be amongst the first to access the latest Intel® Xeon® Scalable processors through cnvrg.io here. - Login to your account.
- Once you’ve entered cnvrg.io, in the projects tab, click on create new project button.
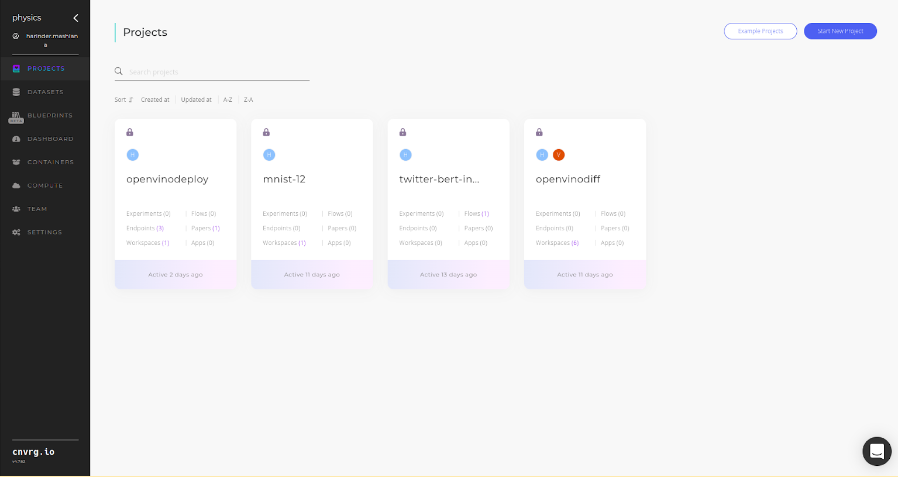
4. Name your project and click submit.

5. Click on the blue ‘new workspace’ button to start a jupyterlab workspace so we can easily create, edit and run code.

6. You need to specify the name of your workspace and additional properties like compute, image etc and click on start workspace button. For this demo we selected the image with python version >=3.8 installed and Intel® Xeon® Platinum 8480+ with 20 cores and 40 GB RAM. Note: You can work with much lesser RAM and cores on Intel® Xeon® scalable processors.

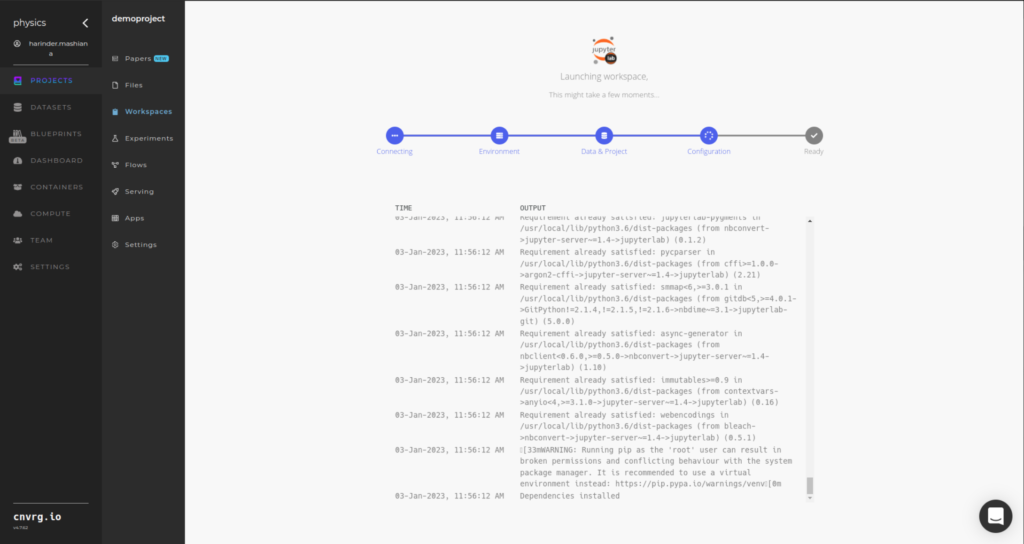
7. Next, the workspace will start loading and you will see a screen like this:
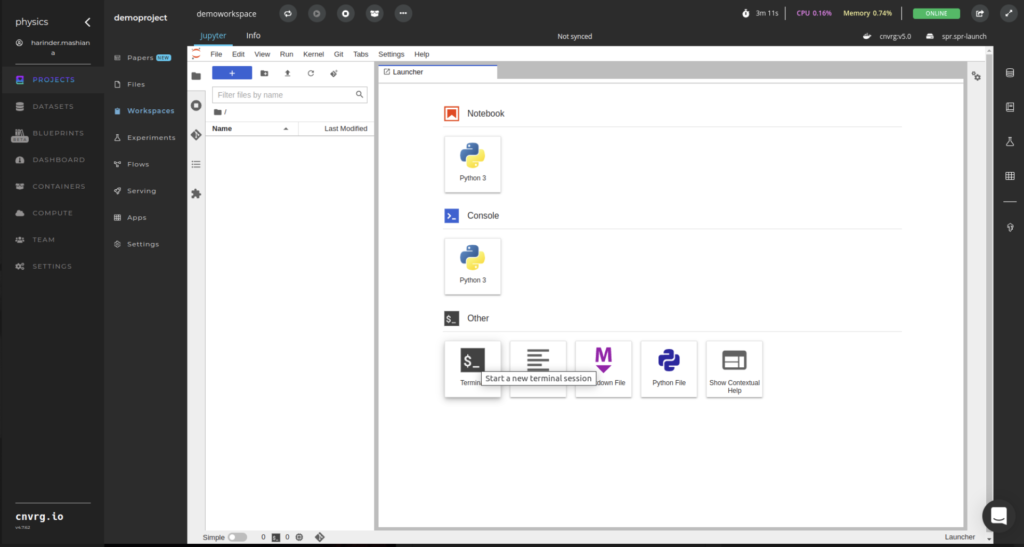
8. Once the workspace starts, click on the terminal option to start a terminal so you can clone the git repository for stable diffusion.
9. Run the following commands to clone git repository and move into the cloned repository:
> git clone https://github.com/bes-dev/stable_diffusion.openvino.git
> cd stable_diffusion.openvino/
10. In the requirements.txt file, change the openvino==2022.1.0 to openvino==2022.2.0 and then run the following command:
pip install -r requirements.txt
11. Now you need to update the number of cores to the cores in your computer. In our demo we are using 20 cores and we will update it to the same:
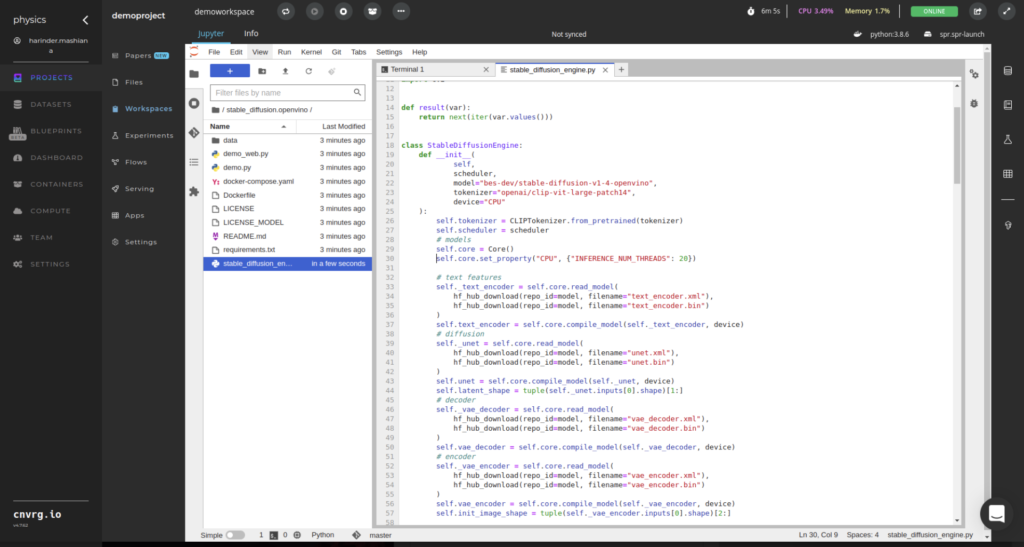
- Open file stable_diffusion_engine.py
- open .py file
- find line self.core = Core()
- Under the line, self.core = Core() add the following line of code:
self.core.set_property(“CPU”, {“INFERENCE_NUM_THREADS”: 20})
and change 20 to the number of cores in your CPU.
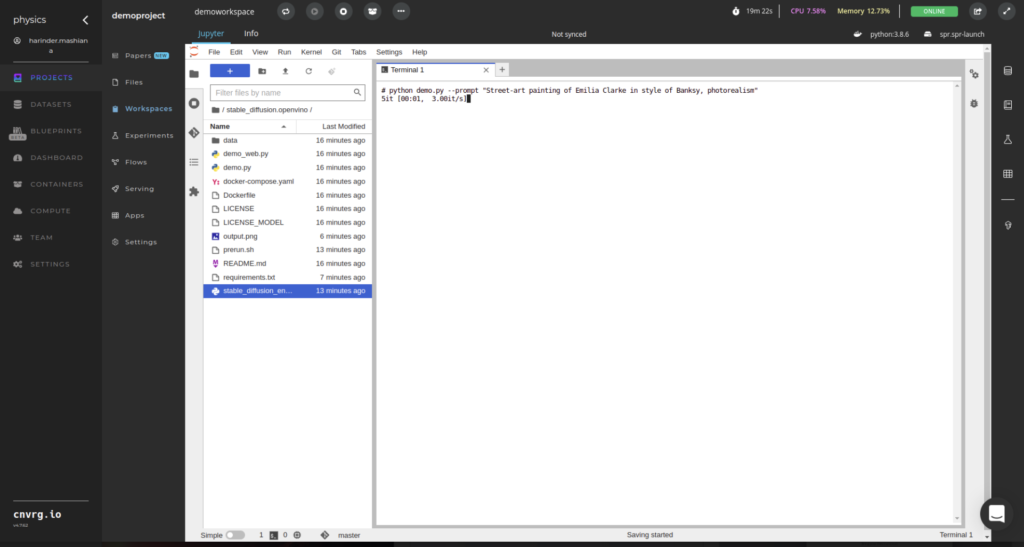
12. Now you can run the following line of code with your own prompt and receive the output.
> python demo.py –prompt “Street-art painting of Emilia Clarke in style of Banksy, photorealism”
Important note:
If you are getting this error on running the code:
ImportError: libGL.so.1: cannot open shared object file: No such file or directory
You will need to create a file called prerun.sh and add the following lines to the file
					pip install --upgrade pip
apt-get -y update
apt-get install -y git
apt-get install -y libgl1-mesa-dev
pip uninstall -y pillow
pip install --no-cache-dir pillow
apt-get install -y libpangocairo-1.0-0
And then in the terminal run the command:
> sh prerun.sh
As you can see, in a matter of seconds, you can have a stunning image generated from your own custom text prompts without a GPU. Utilizing the latest Intel® Xeon® Scalable processors and OpenVINO, you can achieve 3x faster results compared to the latest Intel® Xeon® Platinum 8480+ utilising 20 cores vs Intel® Xeon® Gold 6154 CPU @ 3.00GHz. Now it’s your turn to get creative and start generating your own custom images with stable diffusion.