The use of machine learning to solve various business problems has become ubiquitous. Machine learning models can be consumed by users directly or indirectly through other software. Both scenarios require that the model is put into production. Productionizing a machine learning model can easily turn into a nightmare especially when you don’t employ the right tools. In this article, you will follow an example of how to deploy machine learning models using TensorFlow Serving. You can expect to cover:
- How to install Tensorflow Serving with docker
- Saving a pre-trained image classification model in TensorFlow
- Serving the saved model using Tensorflow Serving
Note:
In this article, we shall employ a Keras pre-trained model because the article isn’t intended to be an end-to-end tutorial on how to create image classification models. Doing so would deviate from the sole purpose of the article which is to show how to deploy machine learning models. If you are unfamiliar with how to use convolution neural networks to create image classification models, take a look at this article first.
Introduction to Tensorflow Serving
Tensorflow Serving is a system aimed at bringing machine learning models to production. It is mainly used to serve TensorFlow models but can be extended to serve other types of models. After successfully serving a model, it exposes API endpoints that can be used to interact with the model.
You might now be thinking, “I am familiar with Django and Flask, why can’t I use them to serve models?” Well, I am glad you asked. Here are a couple of reasons why you might not want to deploy your models the traditional way:
- Lack of code separation: The traditional way leads to messy code because you will have to mix the usual Python web development code with data science code. Usually, it’s good practice to keep these two separate. After all, the teams working on the two are different.
- Inefficient model version control: Versioning models is very important. Versioning models makes it easy to track models in production as well as switch between different models. You could write your model versioning system but why would you want to reinvent the wheel?
- Inefficient model inference: Models served traditionally can be very slow at inferencing. Deploying a model with a tool like TensorFlow serving produces endpoints that are faster during inference. For instance, the tool will also generate a gRPC endpoint which is faster than the usual REST API. More on this later.
Employing TensorFlow serving will address all the above issues. Some of the functionalities of TensorFlow serving are:
- Serving machine learning models
- Managing model versions
- Serving models based on policies
- Loading models from different sources
TensorFlow Serving architecture
Before jumping into model serving, let’s take a moment to understand key concepts and the architecture of TensorFlow Serving. In TensorFlow Serving, models are referred to as servables. TF Serving can handle several versions of a servable during the lifetime of one server. Versions enable the use of more than one model at the same time. You are free to use the latest model version or to request a certain model version.
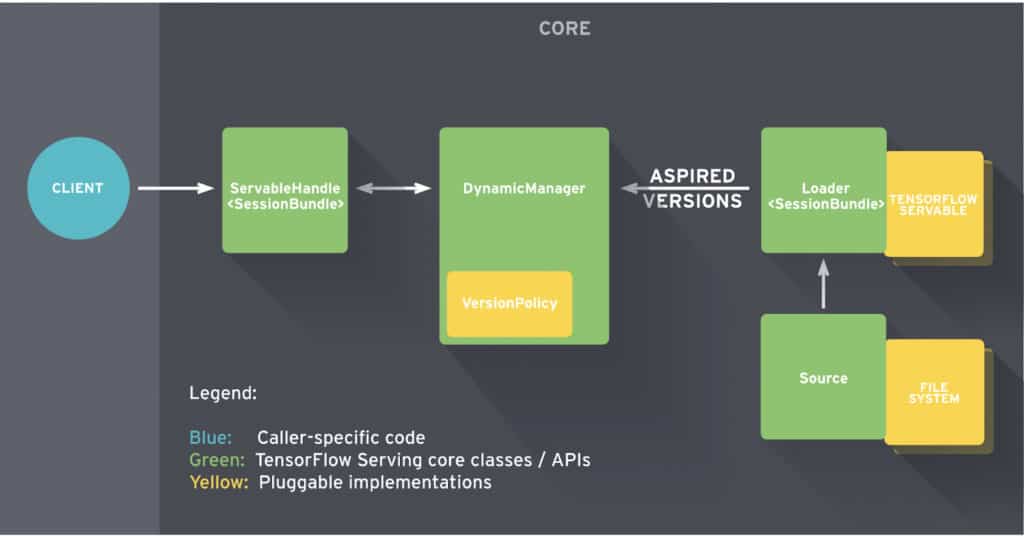
Broadly speaking, TensorFlow serving is made up of the following key components:
- Model source: This contains plugins for finding and loading servables.
- Model loaders: Loaders are responsible for loading and unloading servables from a source.
- Model manager: The model manager is responsible for managing the full life cycle of a servable. It is responsible for fulfilling user requests.
- Servable handler: Provides the interface and API for the client to communicate with TensorFlow serving.
Docker Installation
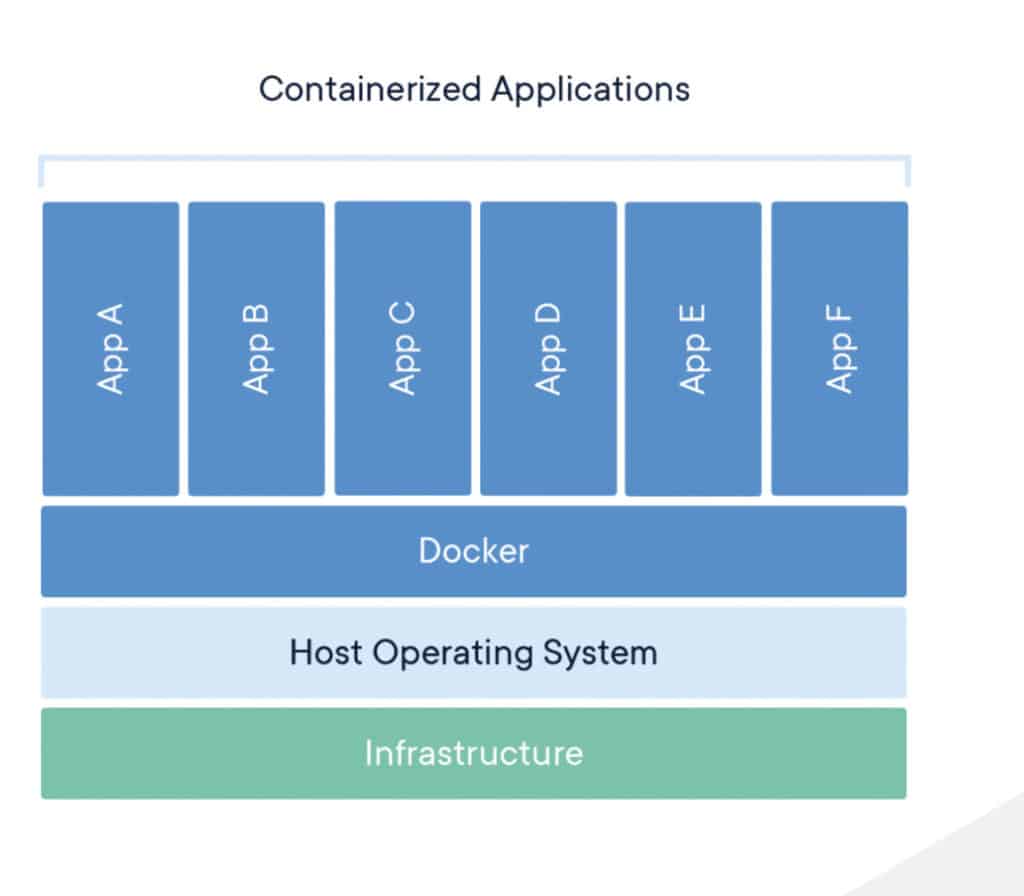
Docker is the easiest and recommended way to install TensorFlow Serving. You could install the library without Docker but the hassle isn’t worth it. Docker was built to make this kind of work easier. This is because the Docker container ships with all the dependencies required to run TensorFlow Serving. The official site best defines a container as:
“a standard unit of software that packages up code and all its dependencies so the application runs quickly and reliably from one computing environment to another. A Docker container image is a lightweight, standalone, executable package of software that includes everything needed to run an application: code, runtime, system tools, system libraries, and setting”.
Follow the links below to install Docker for your operating system:
Note: Attempting to serve models with TensorFlow Serving on Apple M1 laptops with the M1 chip will fail with the error below. As of this writing, no TensorFlow Serving container is compatible with the M1 arm64 architecture on these laptops. This is bound to change in the future. The solution is to use the normal Intel-based Linux, Apple, or Windows computers.
WARNING: The requested image's platform (linux/amd64) does not match the detected host platform (linux/arm64/v8) and no specific platform was requested
qemu: uncaught target signal 4 (Illegal instruction) - core dumped
/usr/bin/tf_serving_entrypoint.sh: line 3:     9 Illegal instruction     tensorflow_model_server --port=8500 --rest_api_port=8501 --model_name=${MODEL_NAME} --model_base_path=${MODEL_BASE_PATH}/${MODEL_NAME} "$@"
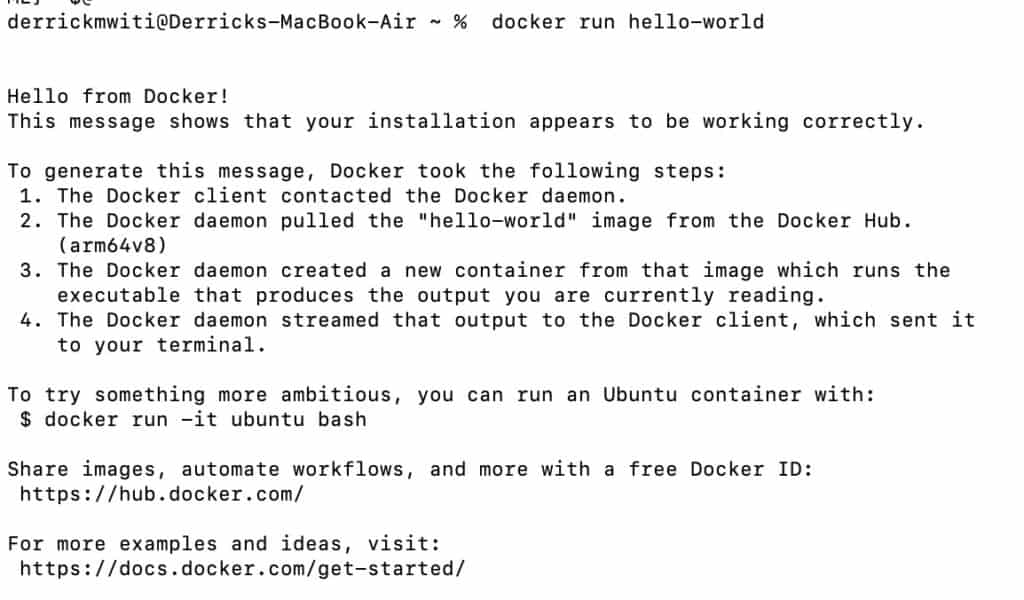
You can confirm the successful installation of Docker by pulling the hello-world container. If you see the result below, it means that Docker was installed successfully.
$ docker run hello-world
Installing Tensorflow Serving
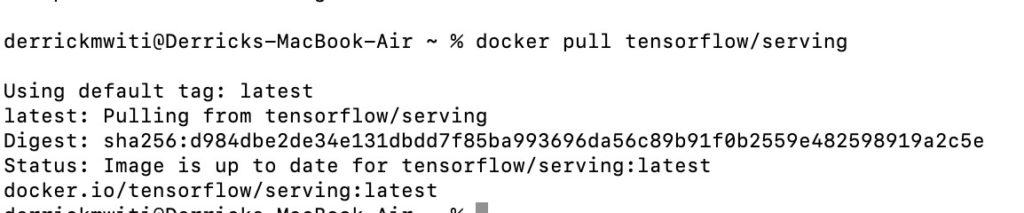
With Docker installed, the next step is to download the TensorFlow Serving image from Docker Hub.
$ docker pull tensorflow/serving
The GPU version can be downloaded similarly.
$ docker pull tensorflow/serving:latest-gpu
At this point, you have everything required to serve a model with TensorFlow Serving. The only item missing is the model itself. Let’s work on that next.
Saving an image classification model
Let’s use a pre-trained classification model to demonstrate how to serve models with TensorFlow Serving. This is important so that the focus is on model deployment and not building, training, and fine-tuning models. You can also use the simple Keras MNIST example here. The bottom line is to use a simple example so that the focus is on model deployment.
Let’s illustrate how to serve models using a pre-trained VGG16 model with ImageNet weights. Start by importing the necessary modules:
- `VGG16` will be used to create an instance of the model
- `image` will load and resize an image
- `preprocess_input` for applying the image pre-processing required by `VGG16`
- `decode_predictions` for decoding the predictions to get the predicted classes
- `numpy` for expanding the dimensions of the image to add the batch size
					from tensorflow.keras.applications.vgg16 import VGG16
from tensorflow.keras.preprocessing import image
from tensorflow.keras.applications.vgg16 import preprocess_input, decode_predictions
import numpy as np
The next move is to instantiate the model.
model = VGG16(weights='imagenet')
Let’s also demonstrate the model at work. This is done in the following steps:
- Defining an image path
- Loading and resizing the image
- Expanding its dimensions
- Preprocessing the image
- Making predictions
- Decoding the prediction to obtain the top 3 predicted classes
img_path = 'lion.jpg'
img = image.load_img(img_path, target_size=(224, 224))
x = image.img_to_array(img)
x = np.expand_dims(x, axis=0)
x = preprocess_input(x)
preds = model.predict(x)
# decode the results into a list of tuples (class, description, probability)
# (one such list for each sample in the batch)
print('Predicted:', decode_predictions(preds, top=3)[0])

The next step is to save the model to a folder. So that this process is reproducible, let’s save each model in a folder named after the current timestamp. This way you will get a new model version every time you change the model or its parameters. TensorFlow Serving also requires the model folder to be in this structure.
import time
current_time = int(time.time())
path = f"vgg16/{current_time}"
model.save(path)
Here’s how the folder structure would look like.
├── vgg16
│ ├── 1618397447
│ │ ├── assets
│ │ ├── saved_model.pb
│ │ └── variables
Serving a saved model with Tensorflow Serving
Let’s now create API endpoints that will be used to interact with the model. By default, TensorFlow Serving will create two endpoints; REST and gRPC.
Communication protocols
REST and gRPC are two different communication protocols. REST is majorly used in web applications. It is a standard style for communicating with web services. REST uses standard HTTP methods such as PUT, DELETE and GET. To get a response from a REST API, you will usually send a JSON formatted payload.
gRPC(remote procedure call) is an open-source communication protocol that was first developed at Google. It uses a data format known as protocol buffers. Compared to REST, gRPC offers low latency communication and smaller payloads.
Serving the TensorFlow model with Docker
Let’s now serve the model using Docker. Fire up a terminal and add the command below. `sudo` may or may not be required depending on the way you configured Docker during the installation process.
sudo docker run -p 8501:8501 --name tfserving_vgg16
--mount type=bind,source=/home/derrick/DataScience/serving/vgg16/,target=/models/vgg16
-e MODEL_NAME=vgg16 -t tensorflow/serving
Okay, let’s break down this Docker command into sizable bits.
- -p 8501:8501: This means that you would like to publish the container’s port 8501 to the host machine’s port 8501. Therefore, when you visit the browser at port 8501, the traffic will be directed to the container’s port 8501
- –name tfserving_vgg16: This is giving the container running TensorFlow Serving the name `tfserving_vgg16`
- –mount type=bind,source=/home/derrick/DataScience/serving/vgg16/,target=/models/vgg16: This instructs Docker to copy the model located at the specified source into the container’s /models/vgg16 folder. TensorFlow Serving will access the model from the container’s /models/vgg16 folder
- -e MODEL_NAME=vgg16: Tells TensorFlow Serving to load the model called vgg16. Note the name of the folder is vgg16
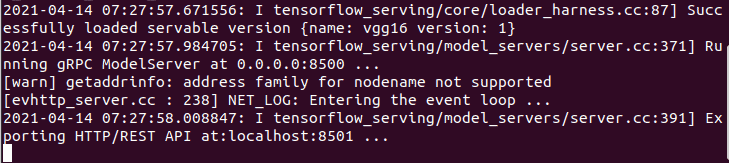
- -t tensorflow/serving: To use the `tensorflow/serving` image downloaded earlier
When this runs successfully, it will create a REST and gRPC endpoint. The REST API endpoint can be accessed at http://localhost:8501.
Make a request to your model in TensorFlow Serving
The final step in this process is to use the REST API endpoint to make predictions using the model. Let’s start by creating a function that will do that. Here’s what this function will do:
- Accept data, headers, and the endpoint as arguments
- Make a POST request to the endpoint
- Convert the obtained response to a Python object
- Decode the predictions using the function provided by the VGG model.
import json
import requests
def run_prediction(data,headers,endpoint):
    json_response = requests.post(endpoint,data=data,headers=headers)
    prediction = json.loads(json_response.text)
    return (decode_predictions(np.array(predictions['predictions']), top=3)[0])
The next step is to define the endpoint, the data, and the headers. Once that is in place, you can use the function above to make predictions. There are a couple of things to keep in mind:
- The data has to converted to JSON form
- The headers should be `application/json` since it’s a REST API. TensorFlow Serving expects the data to be in this form ` {
“instances”: value}`
- Ensure that you pass the URL with the right version of the model
endpoint = 'http://localhost:8501/v1/models/vgg16:predict'
data = json.dumps({"instances": x.tolist()})
headers = {"content-type": "application/json"}
run_prediction(data,headers,endpoint)

The URL can be broken down as follows http://{HOST}:{PORT}/v1/models/{MODEL_NAME}:{VERB}. Here is what the items in curly braces represent:
- HOST is the IP address of your server, in this case, its localhost
- Port is the port the model was served under. You can use a different port while serving the model as long as it is available.
- MODEL_NAME is the name of the model that you want to use
- VERB is the action you want to perform. It can be predict, regress or classify
So far you have seen how to:
- Save an image classification model
- Start a TensorFlow Serving server with the saved model
- Send prediction requests to the server
It is important to note that TensorFlow Serving will automatically load a new model when it becomes available in the folder. In the event that a new model is available, it will unload the old model and load the new one. TensorFlow serving serves the latest model by default.
Common errors when deploying models with TensorFlow Serving and Docker
There are some common errors that you may experience when attempting to deploy models using TensorFlow Serving. Let’s mention a couple and how to address them.
Port is already allocated.
This error occurs when you are trying to publish the TensorFlow Serving container to a port that is already in use. The solution is to use a different port or to free up the port that you want to use.
					661cbc746f682cfca): Bind for 0.0.0.0:8000 failed: port is already allocated.
ERRO[0002] error waiting for container: context canceled
No versions of servable found under base path
This error indicates that you didn’t save the model in a sub-folder that informs TensorFlow Serving of the model version. The solution is to save the model in a subfolder in the main folder. For instance, save the model in a `model/1` folder instead of `model`. If a second version becomes available it should go to the `model/2` folder.
No versions of servable vgg found under base path /models/vgg. Did you forget to name your leaf directory as a number (eg. '/1/')?
The container name is already in use
This means that you are trying to create a TF Serving container with a name that has already been assigned to another container. If that was another TF Serving container you can just use that container instead. If you intend to create another container then give it a different name. Alternatively, you can remove the container with the conflicting name.
docker: Error response from daemon: Conflict. The container name "/tfserving_vgg16" is already in use by container "fcdc7a2af8482a0d58d5df3e3cb98a9a68d532b856b382ca34c2c99390d6d353". You have to remove (or rename) that container to be able to reuse that name.
Challenges of serving models with TensorFlow Serving
While serving models with TensorFlow Serving is quite straightforward, it also marred with a couple of challenges:
- The tool logs model metadata but doesn’t provide a user interface that can be used to view them
- There is no dashboard provided for comparing different models
- It doesn’t provide a way to collaborate with colleagues in the model development process
- By default, the generated endpoints are open and can be accessed without any authentication and authorization
Best practices of using Tensorflow Serving
Let’s mention a couple of best practices to keep in mind while deploying models with TensorFlow Serving:
- Use full paths while running the container to avoid path errors
- Use timestamps or incremental numbers while versioning your models. Versioning models manually will make your iteration process slower
- Consider using a gRPC endpoint when dealing with a large dataset
- Use Kubernetes to orchestrate your model deployment process
- Use the Docker container because it contains all the dependencies required for serving your model
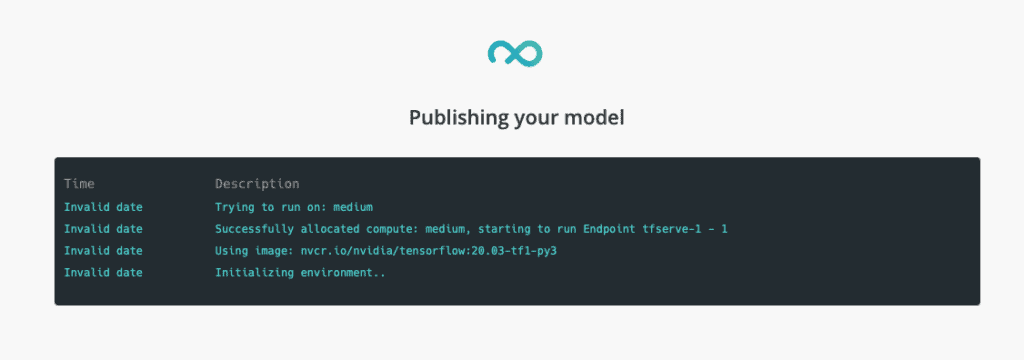
Simplify your Tensorflow serving with cnvrg.io MLOps platform
Tensorflow serving can cause a few technical hiccups. cnvrg.io is an operating system for machine learning that unifies code, projects, and supports deployment at scale. The MLOps solution supports multiple endpoint options, and allows you to deliver models to production in just a few clicks. You can see how the different endpoint options work in this video. You can easily serve a Tensorflow endpoint without technical complexity directly from the cnvrg.io interface. Here’s how it works:
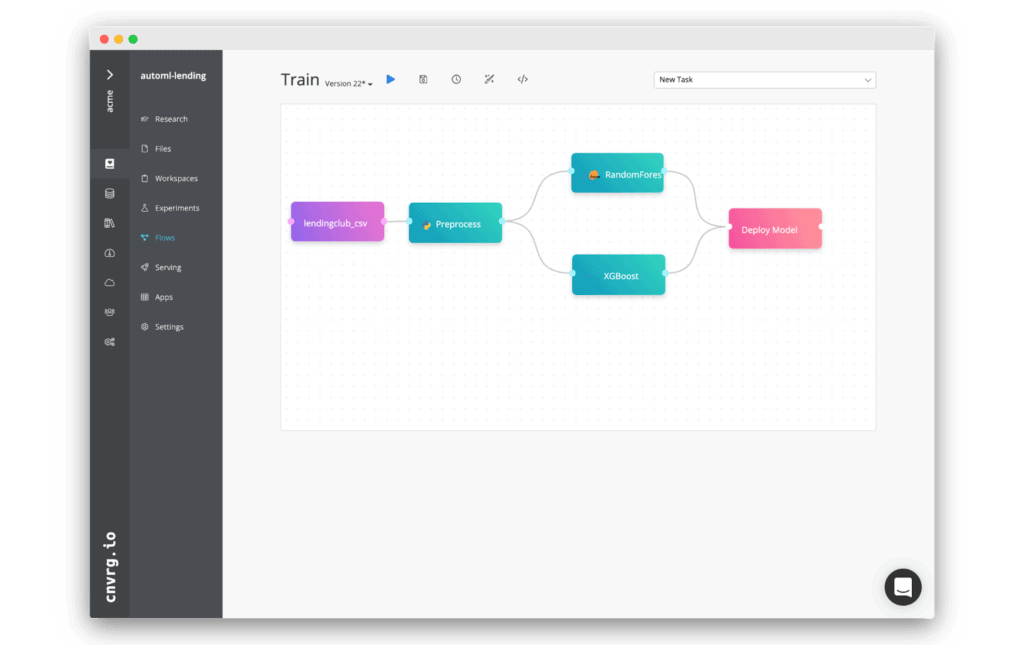
Once you’ve built an ML flow through the DAG interface or via CLI, you can create a deploy task.
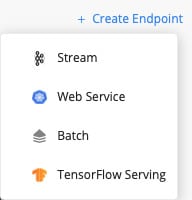
In cnvrg.io simply select Tensorflow serving from the endpoints dropdown.
Provide selections for the compute you require and the docker image you want to have loaded then point to your config.
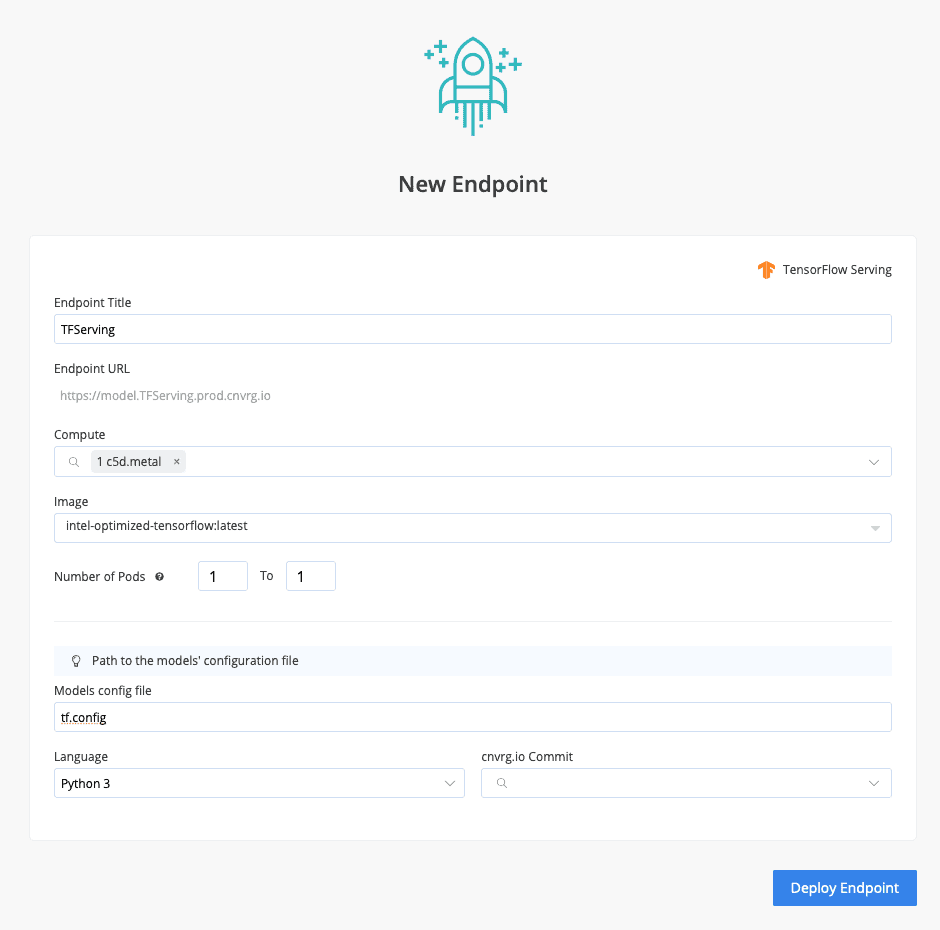
That’s it! Now click deploy and let cnvrg handle the rest.
Final thoughts
In this article, you have had hands-on experience using TensorFlow Serving to deploy your machine learning models. You have also learned about common challenges that you might encounter while serving models. In a nutshell, you have covered:
- What is TensorFlow Serving?
- How to install TensorFlow serving with Docker
- Saving and versioning classification models
- Deploying the saved model using Docker and TF Serving
- Running inferences on a REST API endpoint generated by TensorFlow Serving
- How cnvrg.io simplifies TensorFlow Serving
You are now armed with all the requisite skills needed to deploy a machine learning model using Docker and TensorFlow Serving.